Howto Add a NDMP DLE to Zmanda Using the ZMC Console
- Point your browser to the ZMC console at http://dow.bic.mni.mcgill.ca.
- Login to the ZMC console as user admin (you will need the user’s credentials to login) and select the isilon backup set
- There is only one available anyway so it should selected by default.
- Goal: to add a DLE (Disk Logical Entry) to the Zmanda server config isilon:
- For example, the NFS share /ifs/data/upet1 on the Isilon cluster.
- To do that one must specify that the server will access the client with NDMP protocol (Network Data Management Protocol).
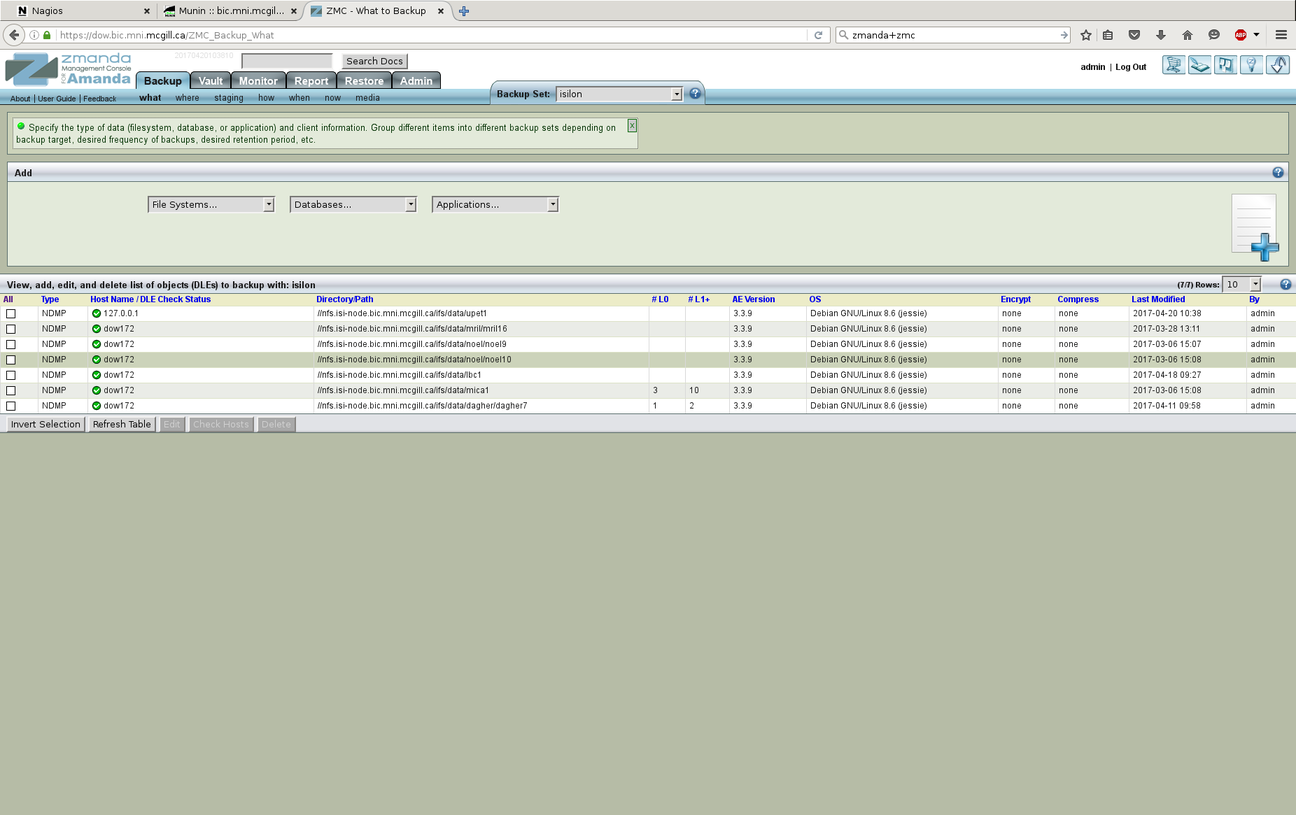
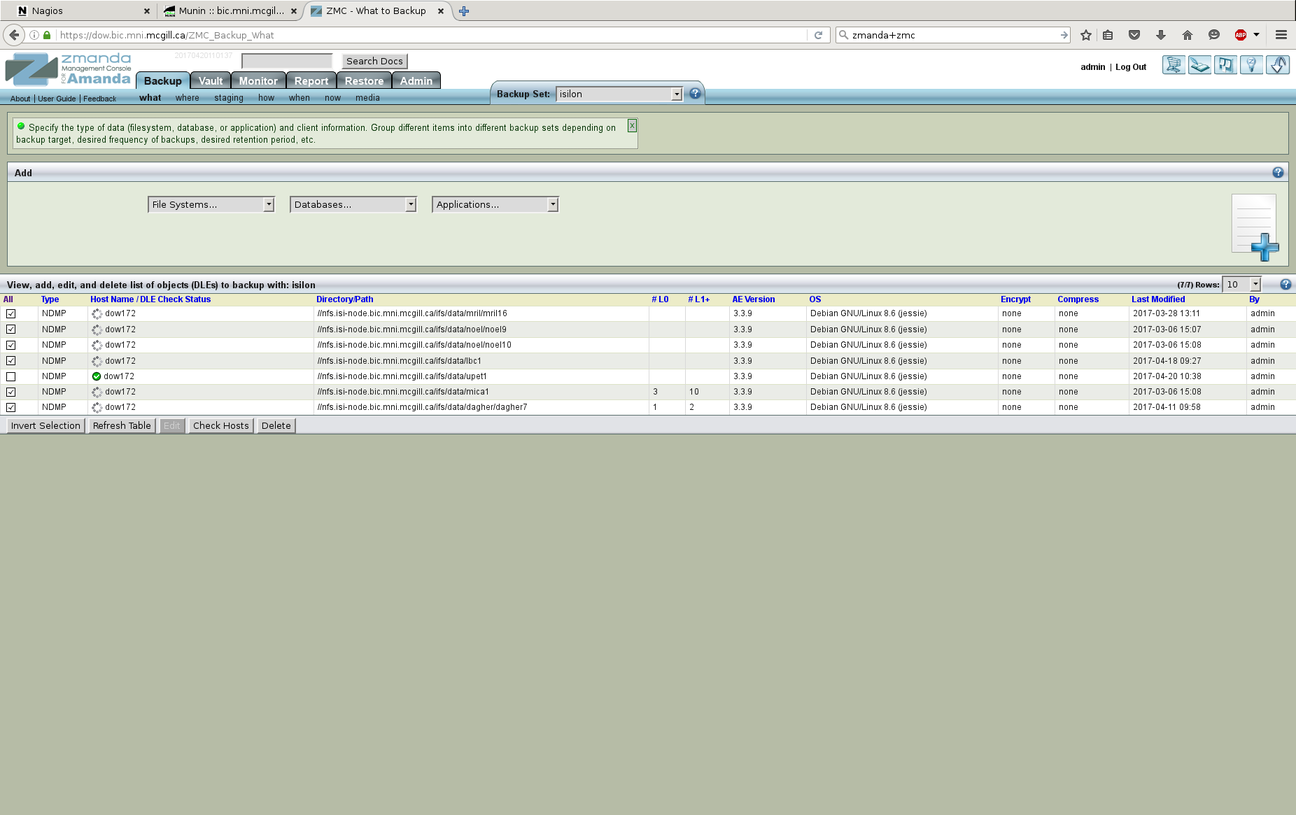
- Go to the tab Backup.
- Minor detail: the snapshot below was taken after adding the upet1 DLE.
- Just pretend it’s not there!
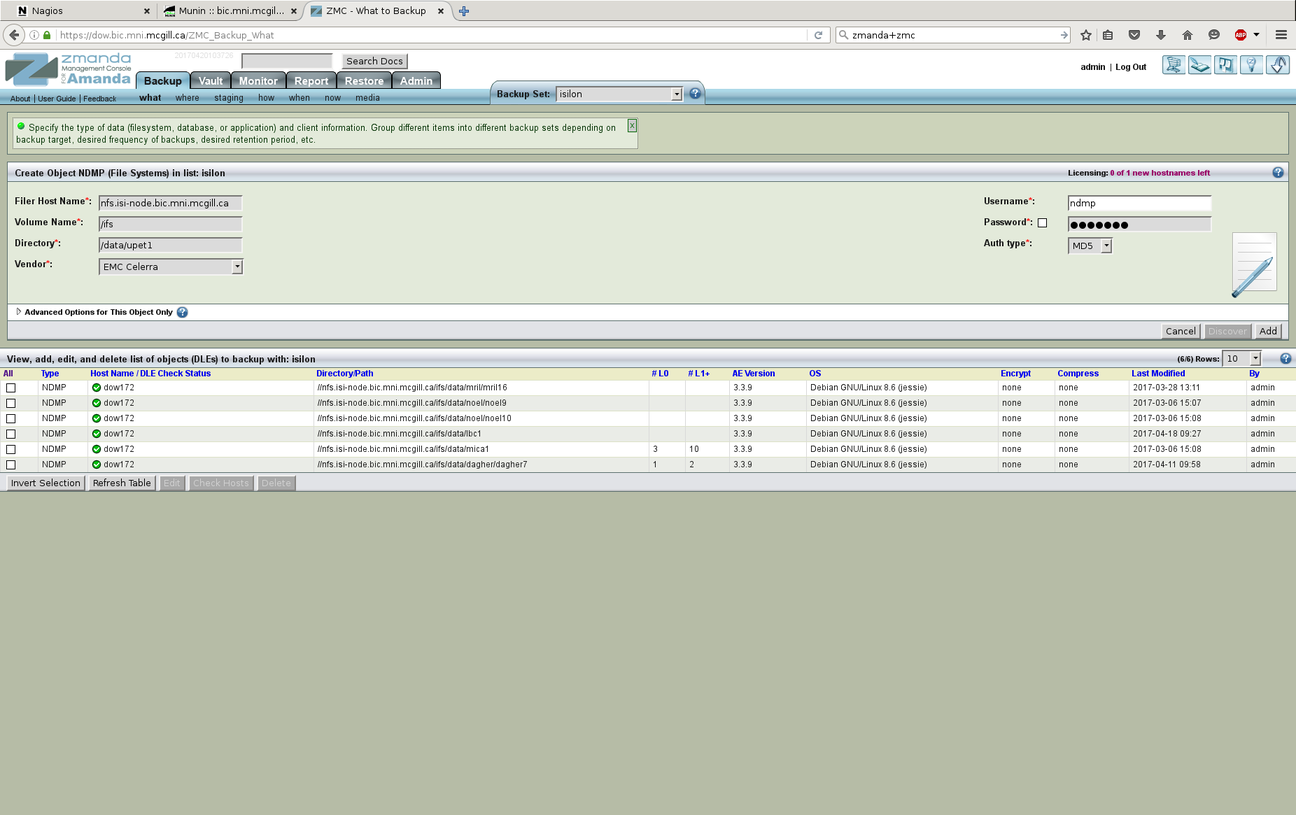
- In the Add top panel, select NDMP under the File Systems… menu.
- In the new window, enter the following info:
    Filer Host Name:  nfs.isi-node.bic.mni.mcgill.ca
    Volume Name:      /ifs
    Directory:        /data/upet1
    Vendor:           EMC Celerra
    Username:         ndmp
    Password:         ******
    Auth Type:        MD5
- Notes: the password entry is mandatory as the Amanda server access the Isilon cluster (through NDMP) as the user ndmp.
- This user has been enabled on the Isilon cluster and requires a password.
- Without it, any NDMP access will be denied.
- MD5 authentication makes sure the password in not sent in clear text and is not saved unprotected in the Amanda server’s config files.
- Obviously, this is not military-grade encryption :)
- Click the Add button the lower right corner ot the top panel.
- You should see the new DLE appears in the display list of the backup set.
- Note the hostname for the new DLE is 127.0.0.1.
- This must be changed to dow172.
- We will do that later.
- If you wish so, you can modify the DLE’s hostname by manually editing the file /etc/amanda/isilon/disklist.conf on the Amanda server and changing 127.0.0.1 to dow172.
- Once done, verify the state of the amanda server and clients by typing on the server sudo -u amandabackup amcheck isilon.
- Fix any errors or warning that show up.
- Warnings about the fact that index files will be created for the new DLE can be safely ignored.
- If all is good, your job is done!
- If you want to absolutely use the ZMC, continue here:
- First, at the bottom, click the button Check Hosts and make sure that all DLEs return OK (green tick).
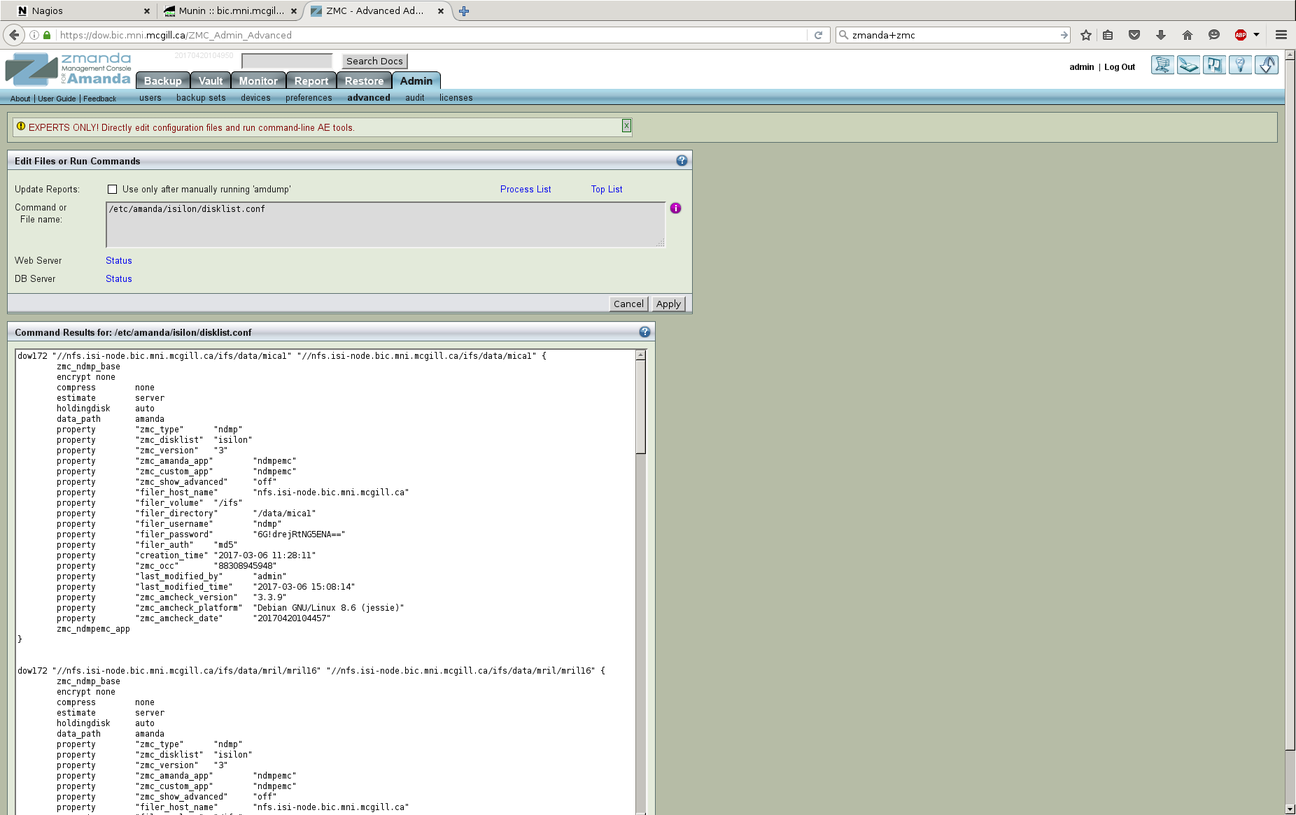
- Go to tab Admin → Advanced
- In the box, enter the disklist path, /etc/amanda/isilon/disklist.conf
- Click button Apply
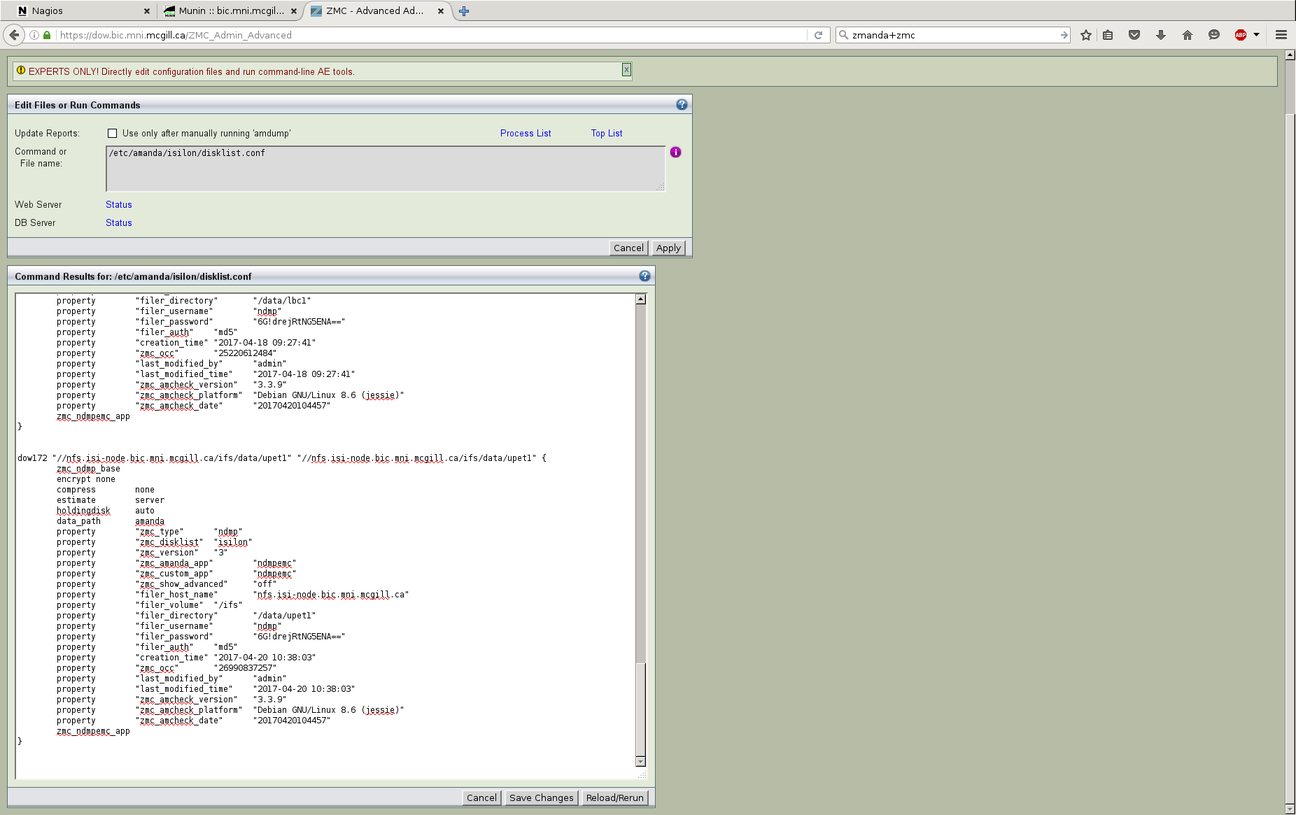
- Scroll/Slide to the bottom.
- Change 127.0.0.1 to dow172
- Click the button Save Changes
- Return to the Backup tab and check that the change has been applied correctly.
- If you prefer, you can also simply logout of the ZMC and manually modify the ascii file /etc/amanda/isilon/disklist.conf
- Once done validate the Amanda config with sudo -u amandabackup amcheck isilon. Fix any errors if they show up.
- Congratulations! You now know how to add a NDMP DLE client to Zmanda using the ZMC console. What an amazing feat!